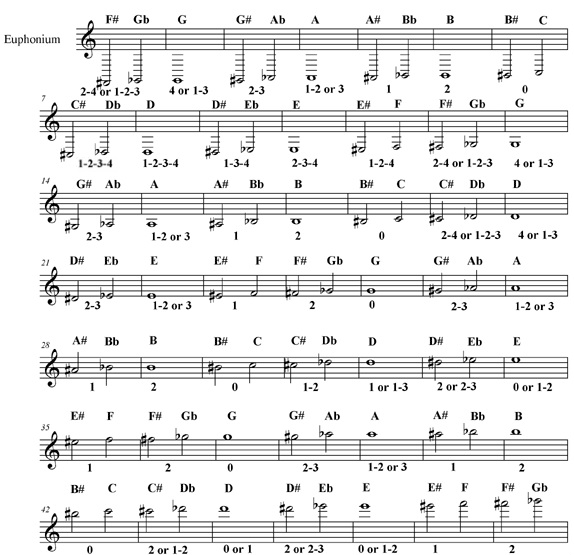
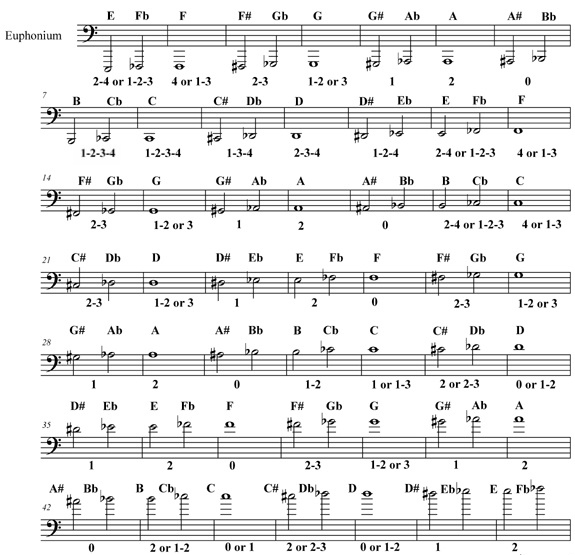
Euphonium Fingering Chart (For Bass clef and Treble clef)
The numbers above are the names of the valves, 1st valve, 2nd valve, 3rd valve, and 4th valve, and the numbers correspond with the adjacent valve.
On the fingering chart, the numbers underneath the notes show which valves you are supposed to push to play the designated note, however you still have to pay attention to if you are playing in the right partial or not, as countless notes are fingered the same. For information on partials visit the Brass Specific page.
Also, the Euphonium seen in the picture is not the setup all Euphoniums share. Many 4 valved Euphoniums have the fourth valve placed on the same side of the instrument, but below. These 4th valves are operated by the pointer finger of the left hand. Also, many Euphoniums lack a 4th valve.
Also, the Euphonium seen in the picture is not the setup all Euphoniums share. Many 4 valved Euphoniums have the fourth valve placed on the same side of the instrument, but below. These 4th valves are operated by the pointer finger of the left hand. Also, many Euphoniums lack a 4th valve.
For 3 Valve Euphoniums
The only part of the range this will take any affect in is the range below the staff. You can accomplish these notes with the 3 valves by removing the fourth valve from the fingering and putting down the rest of the valves you are told to. You then lip down to the note. Lipping down refers to bending the pitch down 5 half steps, the equivalent of putting down a fourth valve. Pitch bending of this extreme is not an easy task and takes much practice to be able to do with proper intonation.
Bass Clef Euphonium Fingering Chart
Treble Clef Euphonium Fingering Chart